devil’s food cake with chocolate buttercream frosting
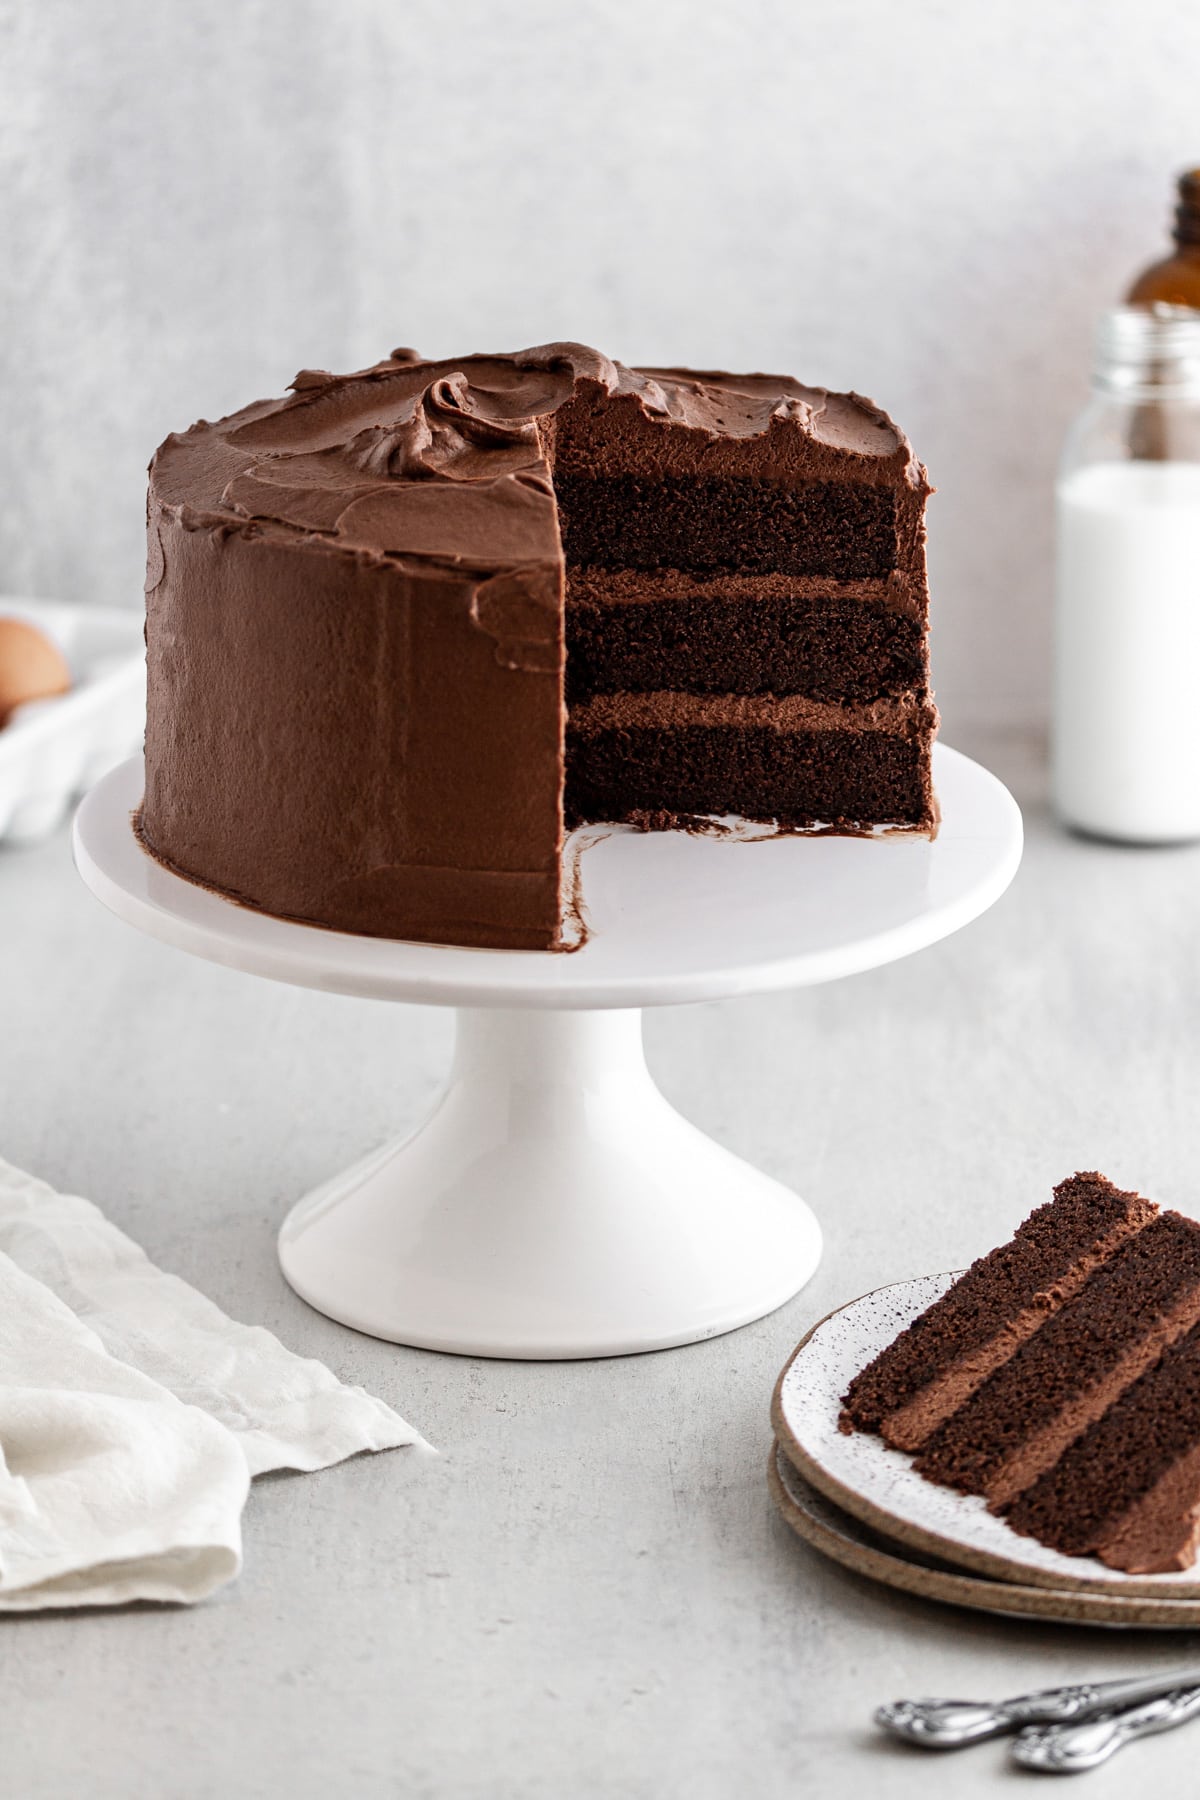
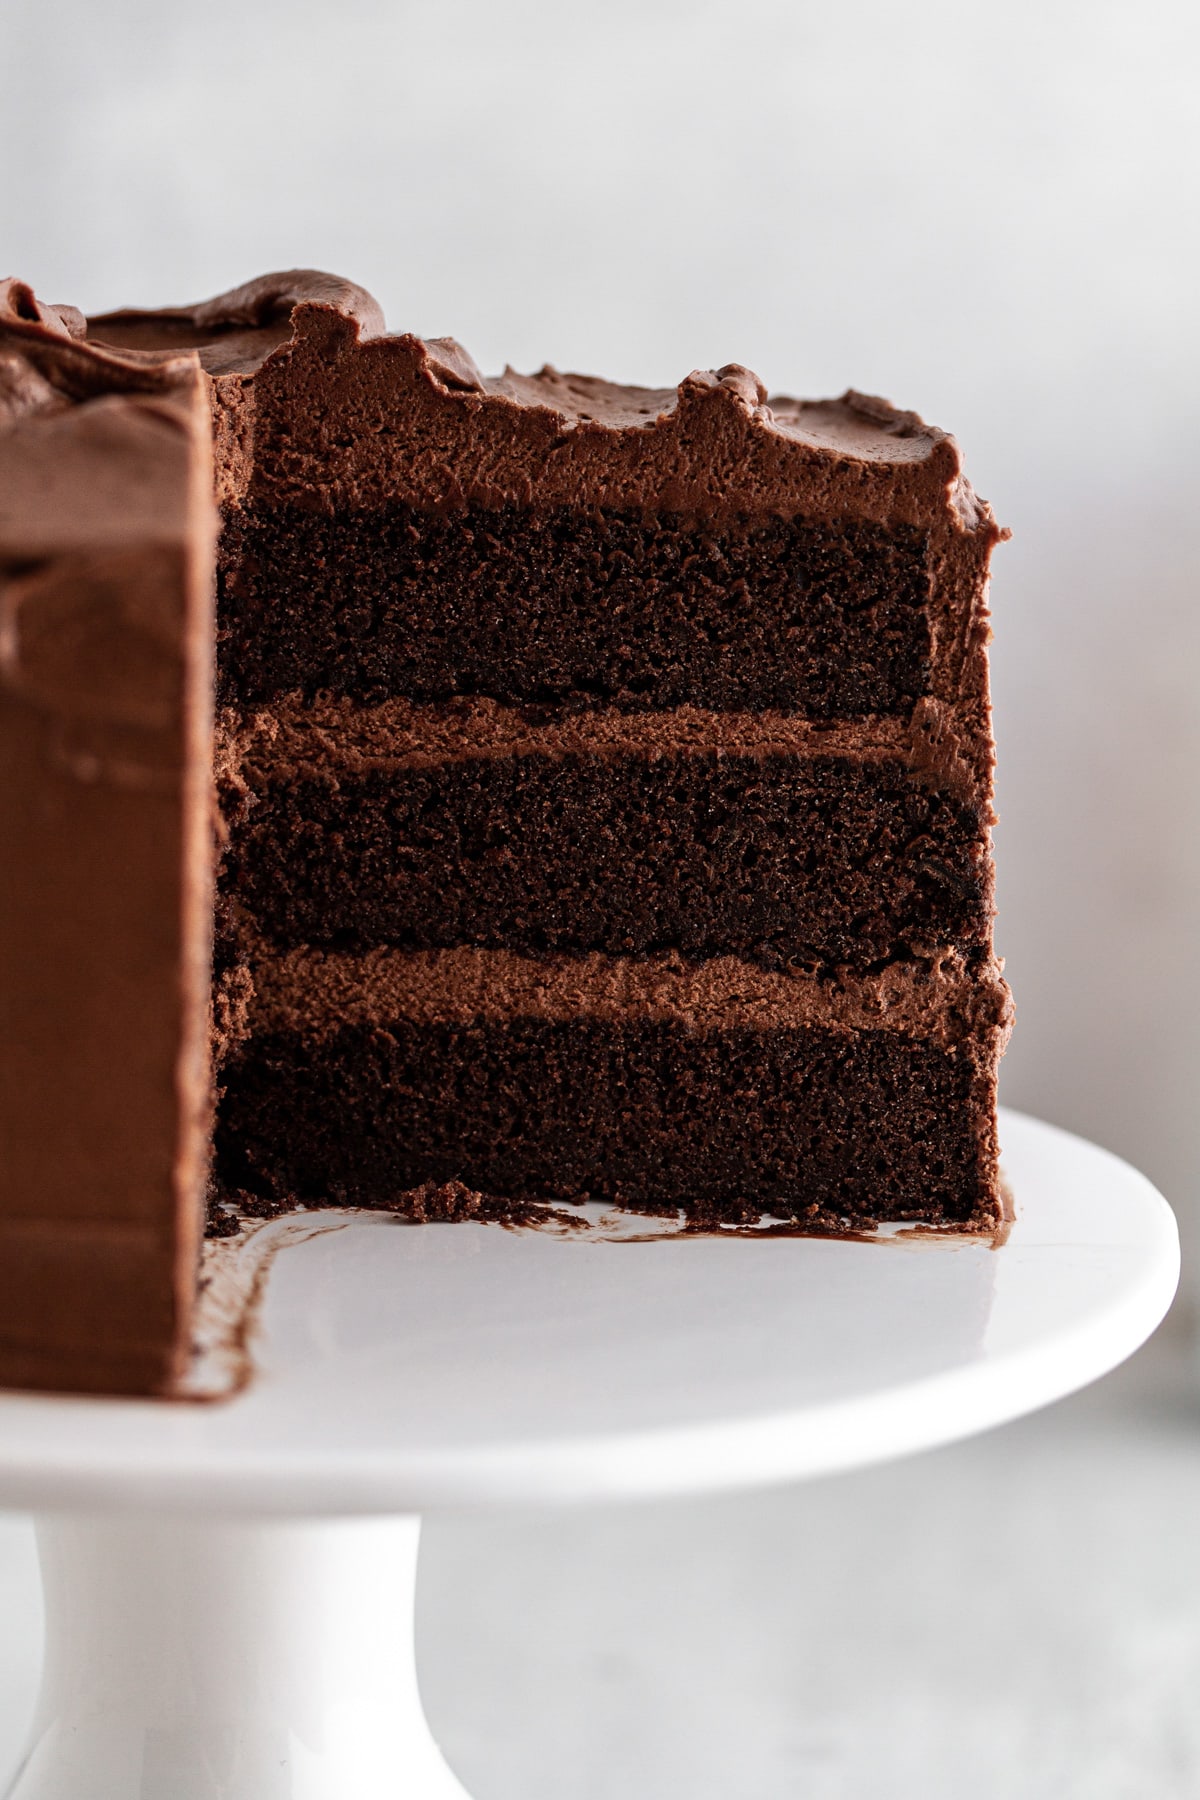
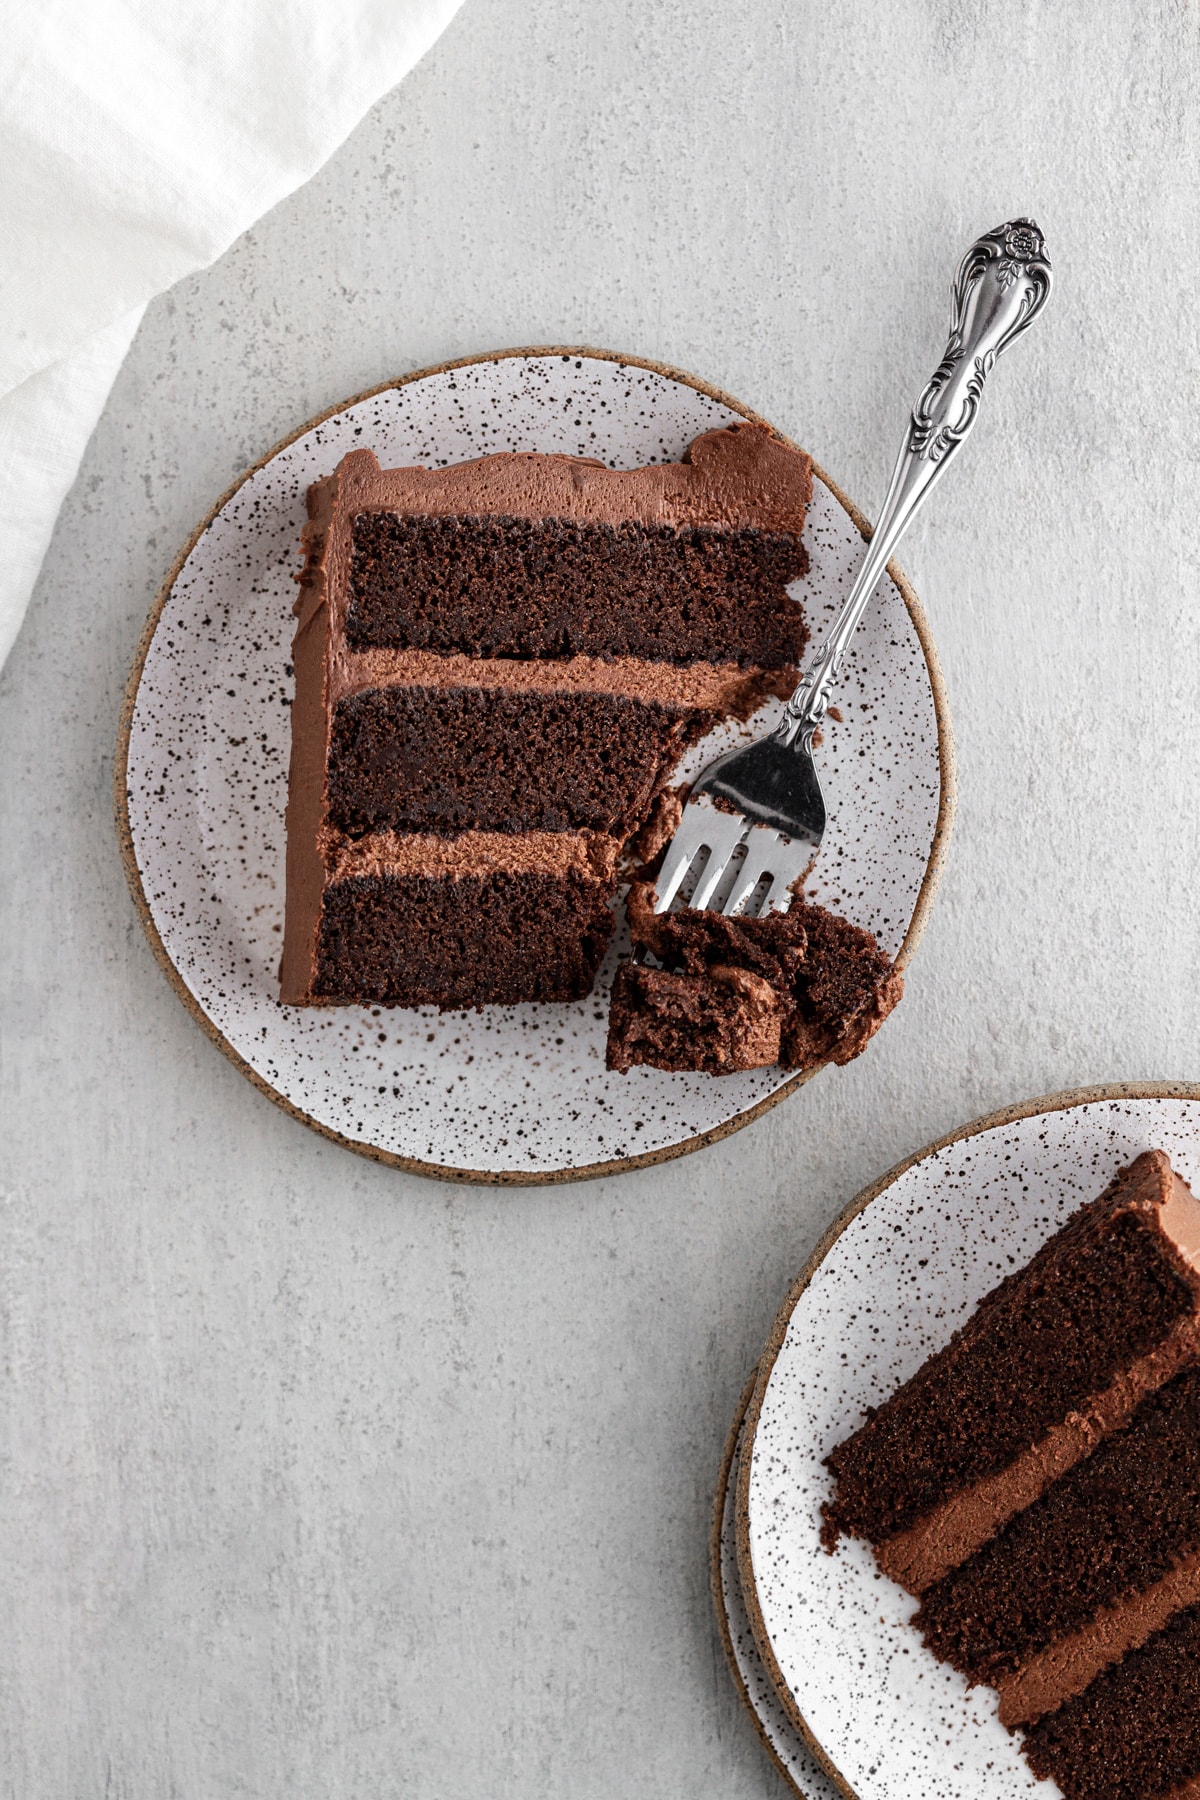
If you’ve never tried the delicious decadence that is a Devil’s Food Cake, drop everything. Right now. And make this cake. Every layer is deeply chocolaty, dense and moist and frosted with the creamiest, most flavorful chocolate buttercream. This is a chocolate cake lover’s dream and worthy of any occasion (even if that occasion is staying at home watching Netflix on a Friday night in your sweatpants).
Devil’s Food Cake with Chocolate Buttercream Frosting
Oh goodness, friends. I am so excited to share this recipe with you today. Since Halloween is just a stone’s throw away, I thought it would be fun and cheeky to develop a Devil’s Food Cake recipe for GVD — but what I didn’t realize is just how much I would LOVE it. Like, cannot stress enough the amount of love I feel for this chocolate cake. It is everything I want a chocolate cake to be at all times and more. The moist, dense cake layers. The smooth, rich chocolate buttercream frosting. Every bite sinfully decadent and delicious. It is dessert heaven (pun very much intended).
Devil’s Food Cake vs. Chocolate Cake
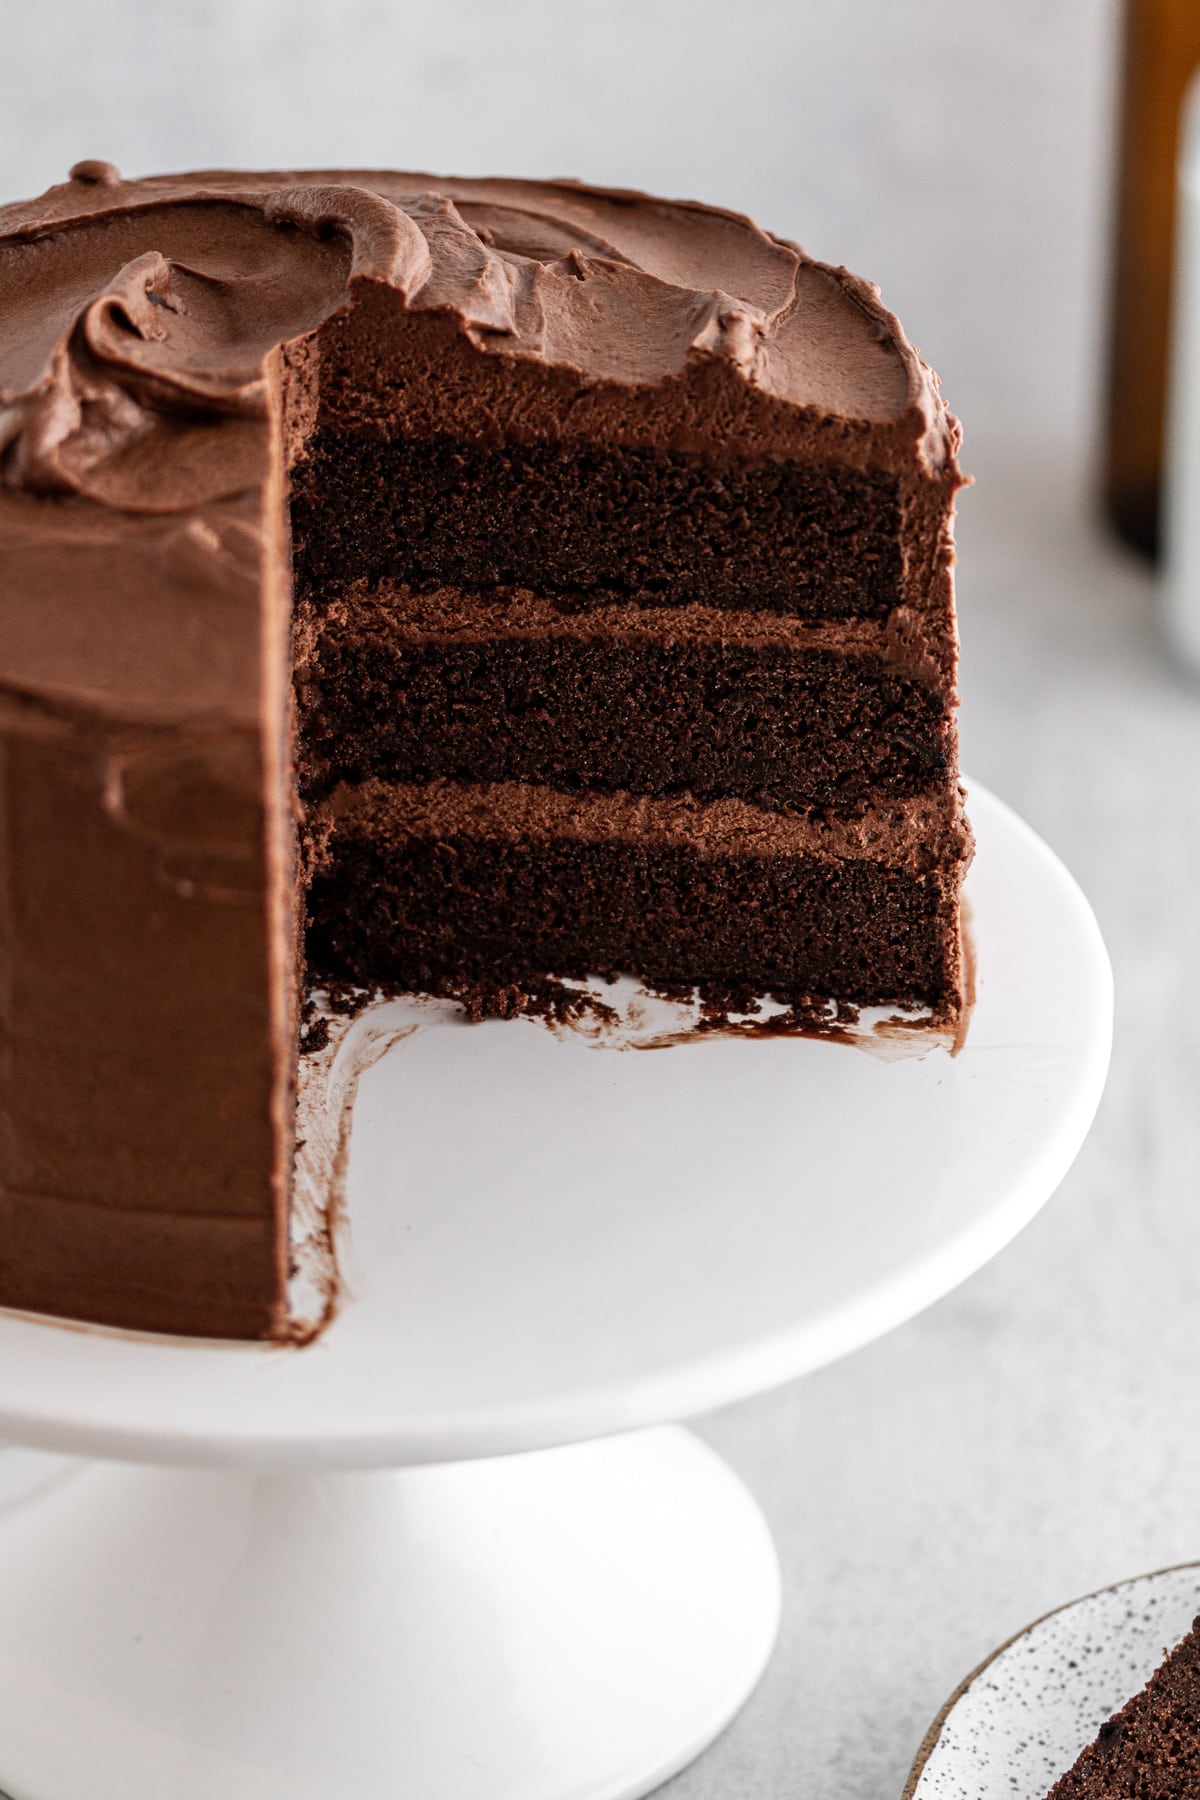
Before we dive deeper into this cake situation and what it entails, let’s take a step back and discuss what, exactly, is Devil’s Food Cake? It’s considered to be the chocolate counterpart to Angel Food Cake (I was today years old when I learned this, and it is a revelation — of course! This makes so much sense!), and it is essentially the same thing as a classic chocolate cake but with a deeper chocolate flavor and darker color. If you get Devil’s Food Cake from a bakery, it’s likely to be denser and moister than a classic chocolate cake and made with more chocolate or cocoa powder.
In the case of my recipe, I used Dutch-process cocoa powder for a richer, deeper chocolate flavor and color (see recipe notes for more info) and paired it with a dark chocolate buttercream frosting for that over-the-top chocolaty-ness. Cake lover, chocolate lover, dessert lover — whatever you are, this cake + you = MFEO.
Tips for the Best Chocolate Cake
And now for the tips! I am still a work in progress when it comes to cake-baking (as you may recall in my Lemon Poppy Seed Cake post), but I’m learning more with practice and, dare I say it, I’m even having FUN making CAKES. I never thought I’d see the day.
ANYWAY, here are my tips:
1. Use those trusty bake-even strips for even cake layers! They help the cakes bake up without a domed top, so you can skip cutting off the domes and wasting extra cake and cutting them all lopsided and such. Been there, done that.
2. Be absolutely sure to follow this recipe exactly as written — use room temperature ingredients where noted, and no substitutes on ingredients (especially ones as noted in the recipe). I can’t recommend any swaps in this recipe since I don’t know how they will perform, and some ingredients are used for very specific reasons (like the Dutch-process cocoa powder; more on that in the recipe) so changes could affect the outcome. I don’t mean to be a Debbie Downer; I just want to be sure you don’t go through the effort of making this cake and it doesn’t turn out how you wanted it to!
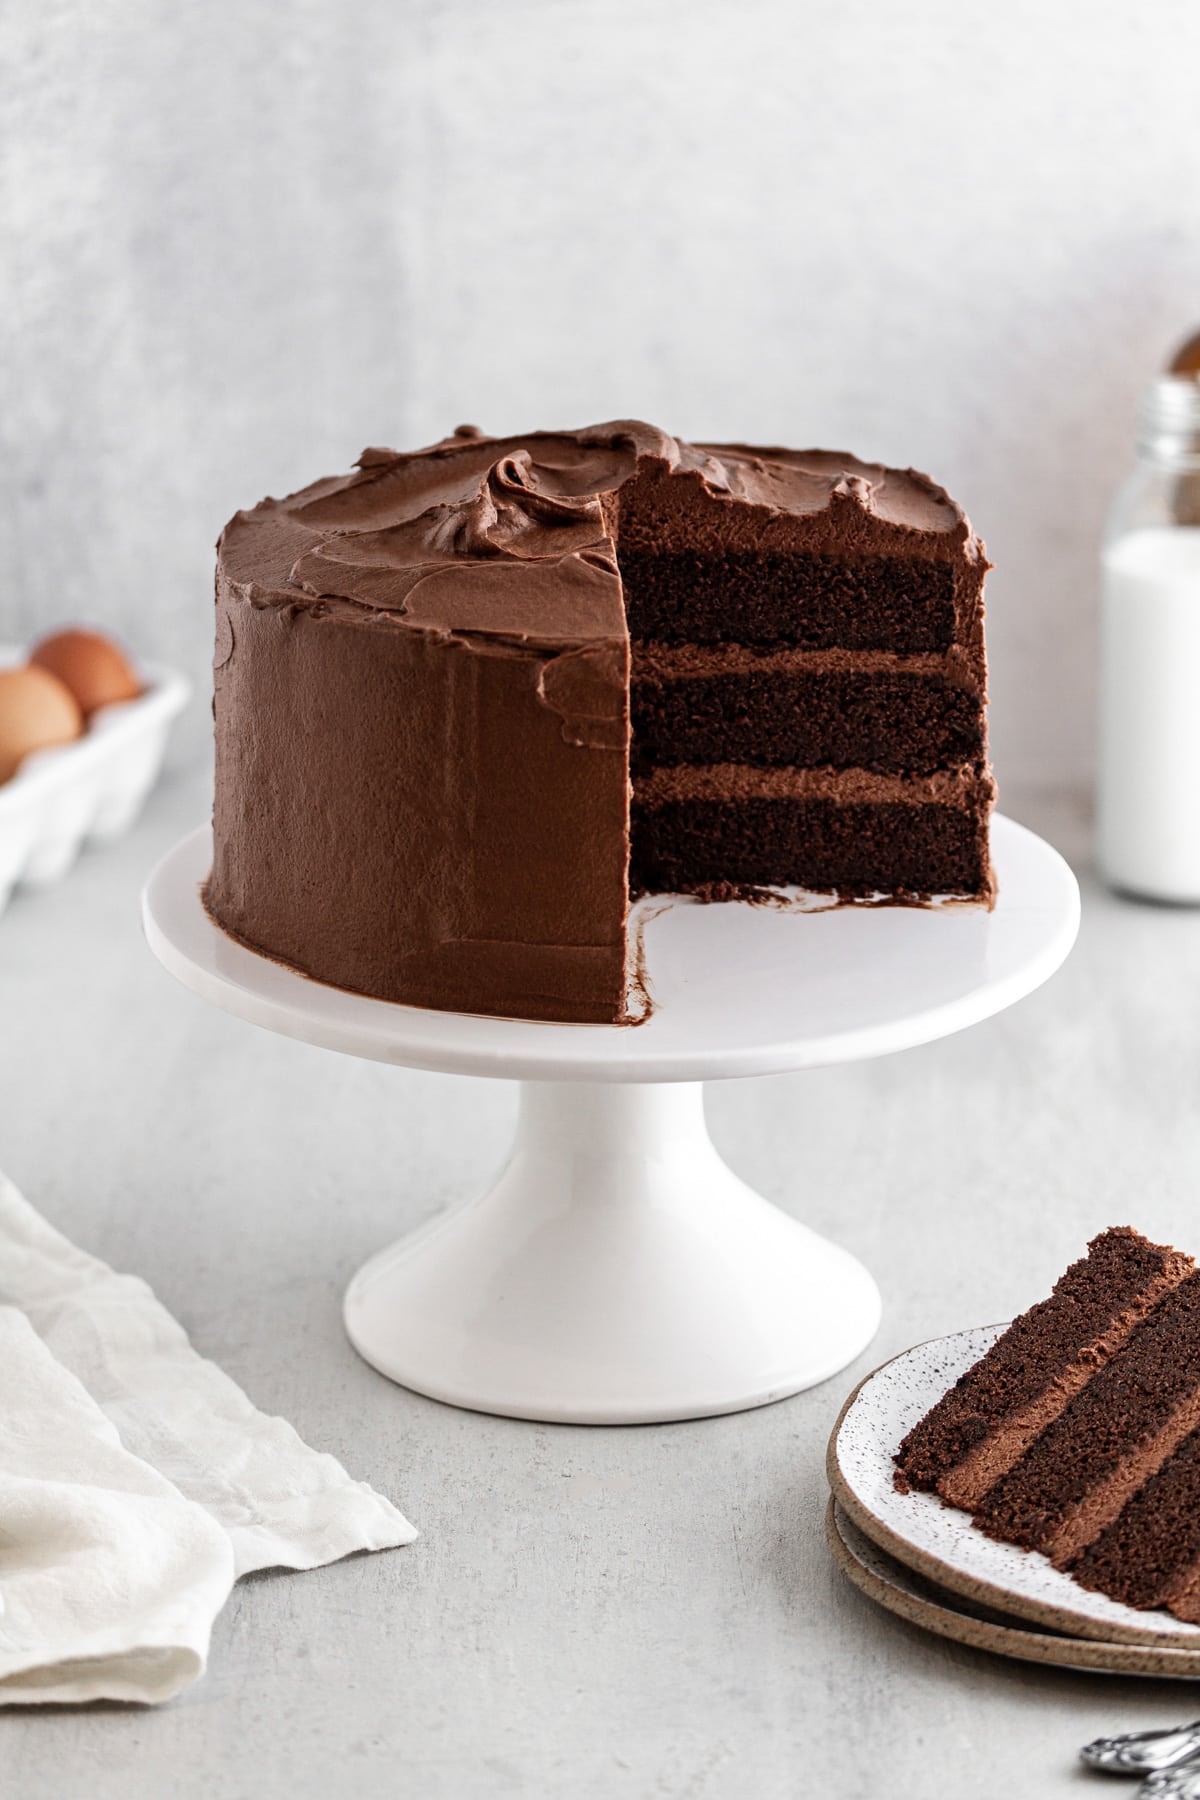
3. You can bake this cake in three 8-inch round pans, two 9-inch round pans or in a 13×9-inch pan, but if you bake it in the latter two options, know that you might end up with extra frosting (not necessarily a bad situation to be in, more just an FYI).
4. I find refrigerated cake layers easier to frost, so I’ll let my cake layers cool completely, then wrap them tightly in plastic wrap and refrigerate for at least 2 hours (or up to overnight). The next day, I’ll unwrap the cake layers and frost them cold. This isn’t necessary, but I’m always game for anything that makes cake decorating easier for me.
Now go forth, bake this Devil’s Food Cake and transport yourself to dessert heaven. So chocolaty. So delicious. SO PUNNY.
P.S. More layer cakes!
Lemon Poppy Seed Layer Cake
Classic Yellow Cake with Chocolate Buttercream Frosting
Vanilla Bean Birthday Cake
Devil’s Food Cake with Chocolate Buttercream Frosting
- Prep Time: 40 minutes
- Cook Time: 30 minutes
- Total Time: 1 hour 10 minutes
- Yield: 16 servings 1x
- Category: Dessert
- Method: Bake
- Cuisine: American
Description
A decadently fudgy chocolate cake with a smooth, deep chocolaty buttercream frosting. Every bite of this Devil’s Food Cake is sinfully delicious!
Ingredients
For the cake:
- 3/4 cup (1 1/2 sticks) unsalted butter, room temperature
- 1 3/4 cups granulated sugar
- 1/2 teaspoon salt
- 2 cups all-purpose flour
- 3/4 cup Dutch-process cocoa powder*
- 2 teaspoons baking powder
- 4 eggs, room temperature
- 1 1/2 cups milk, room temperature
- 2 teaspoons vanilla
For the chocolate buttercream frosting:
- 1 cup (2 sticks) unsalted butter, room temperature
- 4 1/2 cups powdered sugar
- 3/4 cup natural unsweetened or Dutch-process cocoa powder
- 1/2 cup milk
- 2 teaspoons vanilla
- Large pinch of salt
Instructions
- Heat oven to 350°F. Grease and flour (or spray with baking spray) bottom and sides of three 8-inch round cake pans.
- First, make the cake: In a large mixing bowl using an electric hand mixer, beat 3/4 cup butter, sugar and 1/2 teaspoon salt a good 5 minutes on medium speed until very fluffy and light.
- In a separate bowl, whisk or sift together flour, 3/4 cup Dutch-process cocoa powder and baking powder until very well mixed and no lumps remain.
- Beat eggs (on medium speed) one at a time into butter mixture, beating well after each addition. Add one-third of flour mixture to batter, then add 3/4 cup milk, another third of the flour mixture, the remaining 3/4 cup milk and the 2 teaspoons vanilla, and the remaining flour mixture, stirring to combine after each addition and scraping sides and bottom of bowl occasionally with a spatula. Divide batter evenly between prepared pans.
- Bake cakes 30 to 35 minutes or until a toothpick inserted in the center comes out clean. Cool cakes in pans on a cooling rack 10 minutes, then remove from cake pans and cool completely on cooling racks.
- Meanwhile, make the frosting: In a large mixing bowl using an electric hand mixer or in the bowl of a stand mixer with the paddle attachment, beat 1 cup butter on high speed 4 full minutes until pale, smooth and very creamy. Whisk or sift together powdered sugar and 3/4 cup cocoa powder until very well mixed. On low speed, gradually beat in sugar-cocoa mixture, then 1/2 cup milk, 2 teaspoons vanilla and pinch of salt. Beat on low speed 1 minute, then increase to medium-high speed and beat for a full 3 to 4 minutes until frosting is smooth, light, fluffy and creamy. Add more milk or powdered sugar to thin or thicken frosting as desired.
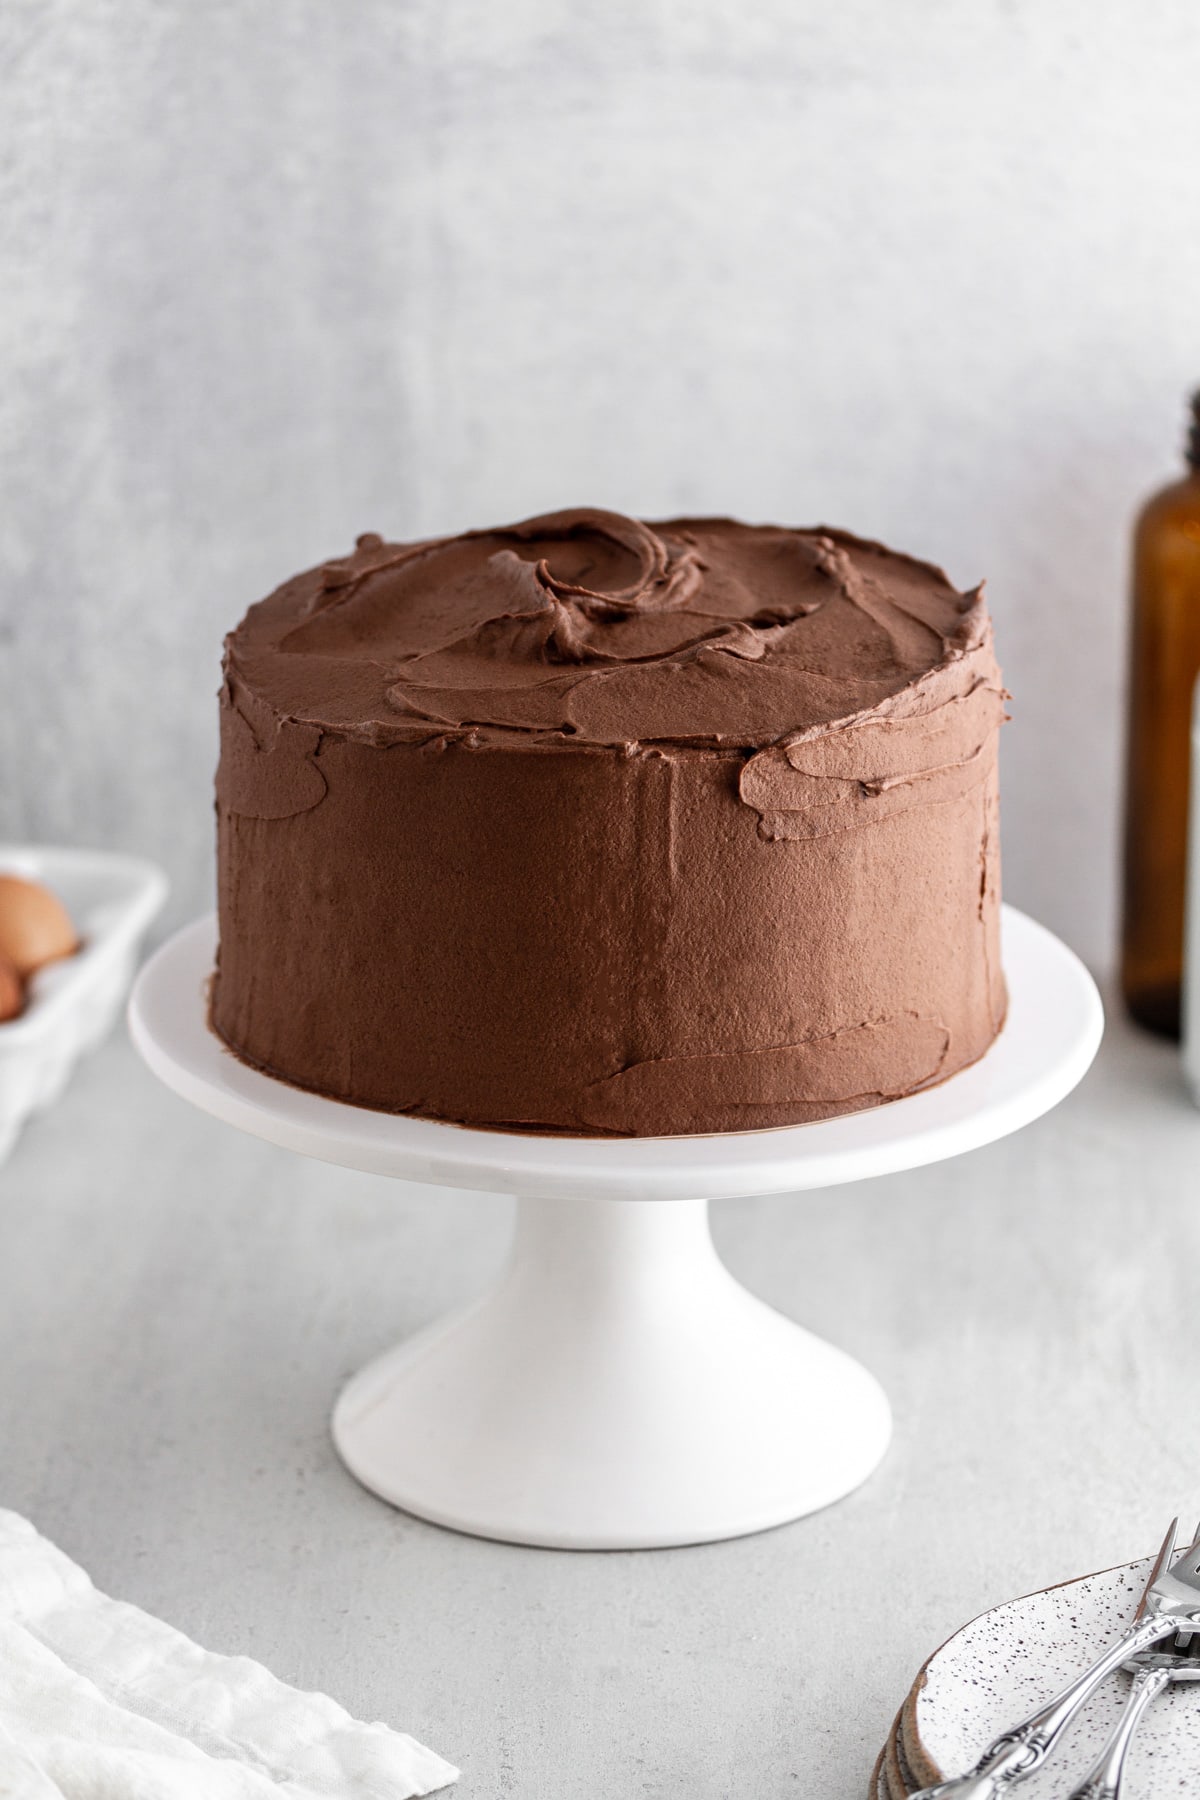
- Place one fully cooled cake layer on a cake stand or serving plate. Top with approximately 1 cup of frosting, in dollops; gently spread to cover entire top of cake layer. Top with second cake layer. Repeat process, topping and spreading with another approximately 1 cup frosting. Top with third cake layer. Frost top and sides of cake with remaining frosting. Cover with a cake dome or upside-down plate until ready to serve.
Notes
- *It’s important to use Dutch-process cocoa powder in the cake. Dutch-process cocoa powder is cocoa powder processed with alkali, a potassium solution that neutralizes its acidity (it also renders a richer, deeper chocolate flavor). Therefore, you need to use baking powder to function as the acid component in the recipe to leaven the cake. Do not use regular/natural cocoa powder for the cake! Here is my favorite Dutch-process cocoa powder.
- You can also bake this cake in two 9-inch round cake pans or in a 13×9-inch pan. Note that you might not end up using all of the frosting if you make this adjustment.
- If the tops of your cakes are domed, use a sharp serrated knife to cut off the domes before stacking in layers. OR, use bake-even strips.
- For best results, use a large offset spatula to frost cake. For clean, smooth sides, I used a bench scraper and gently rotated the cake stand while holding the bench scraper along the sides.
This looks like a terrific recipe. I will definitely make it. However, I really wish that the Print-Friendly version was better! The type is probably 9 pt!
Donna, Thanks for your feedback! I will make a note of this for when I make updates to the site.
This looks delicious! We live in a region of New Mexico where the elevation is higher than Denver. Please share what adjustments you recommend. Thanks!
Hi MaryAnne, Unfortunately I am not at all familiar with baking at higher altitudes. This might be something worth searching for on Google or find another recipe that is calculated for elevation.
Pingback: Satan's Meals Cake with Chocolate Buttercream Frosting - fooshya.com
Hello Stephanie,
I looked up your Dutch – Process Cocoa Powder on the amazon site. Is this container enough to make this cake Stephanie ?
My family loved this recipe! I made it for valentines, it is the only cake recipe I have ever made that almost turned out like a brownie instead of a cake. Another bonus is it was not too overly sweet like most chocolate on chocolate cakes are. The only thing I changed was using fresh brewed coffee instead of the water. Coffee really bring out the flavor of chocolate. Thank you so much for the recipe!
What adjustments would I make if I need to frost a 3 layer 9 in cake
Crystal, This recipe would work as written for a 3-layer 9-inch cake! You might have slightly thinner layers of cake and frosting, but the recipe as written includes enough frosting to cover it well.
Hi when it says 2 tsp vanilla does it mean v. extract or v sugar?
Francine, extract!
best chocolate cake ever!!!!
I need for 3 layer of buttercream recipe. Does that mean i need tobclick 2x?
I will make this for my competition. Thank you.
can you use regular butter instead of unsalted?