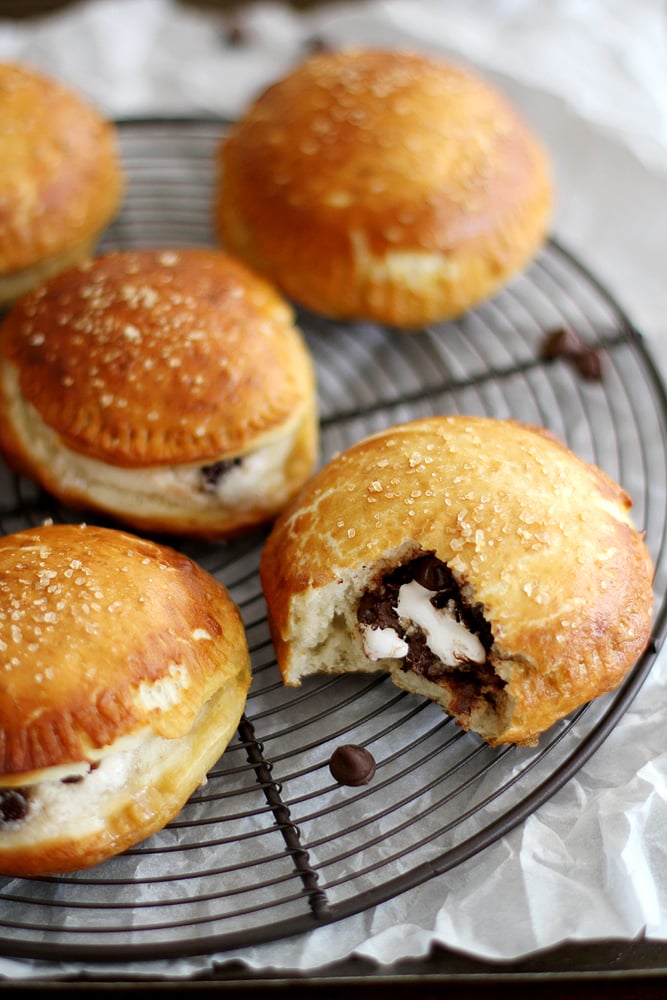
s’mores pretzel hand pies
Because Monday. Because pretzels and pie and chocolate and marshmallows. Because summertime.
You know, in case you needed excuses to make these hand pies as soon as humanly possible.
I feel like s’mores are having their moment this summer — you agree, yes? The flavor combo is popping up everywhere and in so many mega-yummy ways. So of course, being the bandwagon jumper I am, I had to join the party with stuffed pretzels because it’s what I do. And sweet + salty gets me every time.
So in case you feel like you haven’t had your fair share of s’mores things this season (if there is such a thing as too many s’mores… I mean, the name itself implies its impossibility), now’s the time to join the bandwagon with me and make this recipe. Then we can all gather ’round and eat s’mores hand pies and swap ghost stories around a fire and sing “Kumbaya” together.
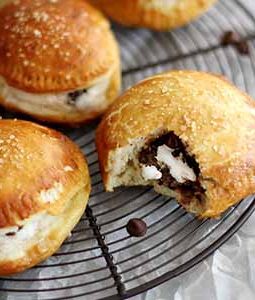
But before I get carried away, let me tell you what is going on with these pies. First, I must admit — there is no graham cracker. I KNOW. But I didn’t think it was necessary, what with the pretzel taking its place. Still, if you feel the need to get your graham cracker fix (which I totes understand), you could sprinkle a little crushed graham cracker on top of the pretzels before they are baked. And then tell me what that tastes like because I was too impatient to do so when I made these. These things happen when chocolate and marshmallows and sea salt are involved.
Secondly, the filling? OMGAHHH. It’s not only marshmallow creme and chocolate chips that get all melty when you bake the pies, but also cream cheese. It makes this overall situation just that much more, oh I don’t know, DELICIOUS. And creamy and sweet and all that good stuff.
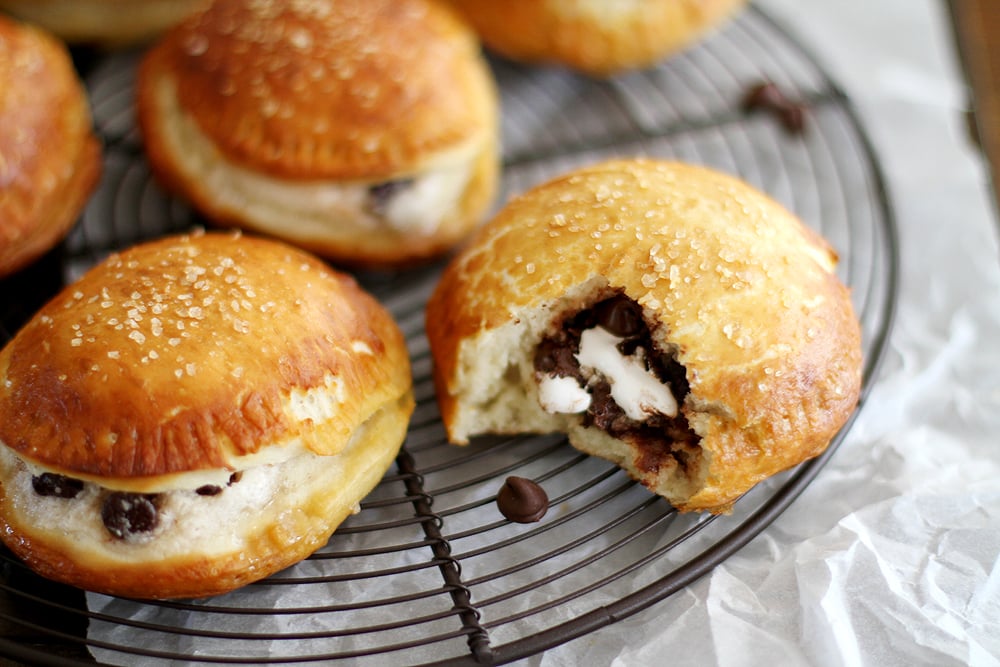
Thirdly, these pies taste best the day they are made, preferably straight from the oven to your pie hole (except maybe wait like five minutes so you don’t burn your tongue, mmk?). It’s exactly how I ate one, and then promptly gave the rest away to my husband’s co-workers because I was sensing I was entering the danger zone with these (Danger zone = eat all the s’mores hand pies in one sitting). Yet I sort of regret this decision, because what is a s’more if you can’t eat, well, s’more of it? Yes, yes I did go there.

Anyway, the moral of the story is this: Soft pretzels + s’mores filling = match made in sweet and salty heaven.
S’mores Pretzel Hand Pies
- Prep Time: 1 hour 20 mins
- Cook Time: 14 mins
- Total Time: 1 hour 34 mins
- Yield: About 16 hand pies 1x
Ingredients
For the pretzels:
- 1 1/2 cups warm water (about 110 degrees F)
- 1 tablespoon granulated sugar
- 2 1/4 teaspoons (1 packet) active dry yeast
- 4 1/2 cups all-purpose flour
- 2 teaspoons salt
- 4 tablespoons (1/2 stick) unsalted butter, melted
- 10 cups water
- 2/3 cup baking soda
- 1 egg yolk beaten with 1 tablespoon water (egg wash)
- Sea salt, for sprinkling
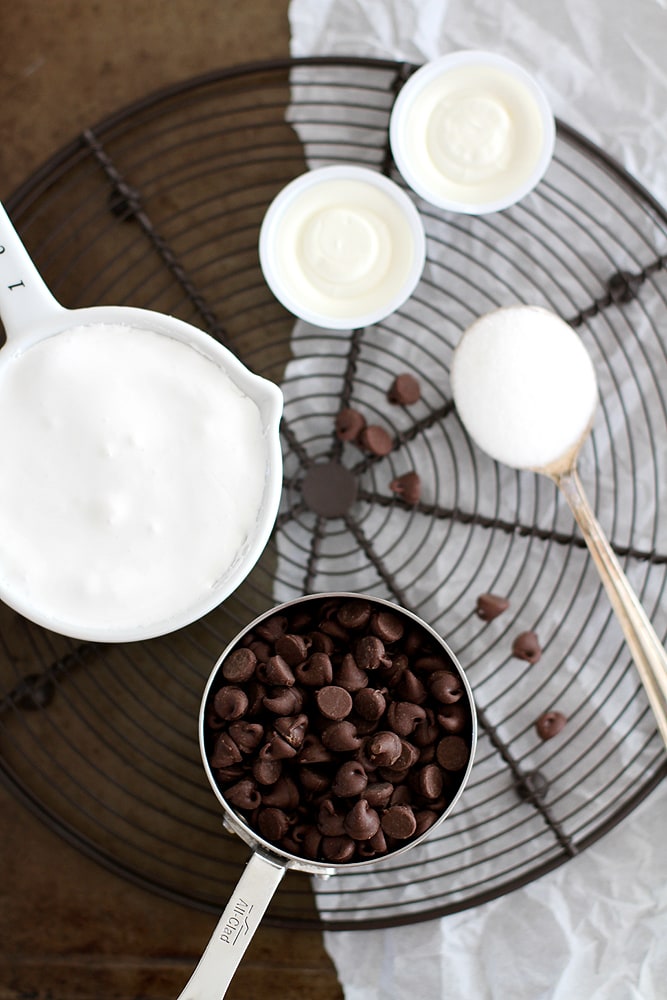
For the filling:
- 1 cup marshmallow creme
- 1 cup semisweet chocolate chips
- 1/4 cup granulated sugar
- 1/4 cup (2 oz) cream cheese, softened
Instructions
- Combine water, sugar and yeast in the bowl of a stand mixer; let sit 5 minutes until foamy.
- Add flour, salt and butter; stir to combine. Using a dough hook, knead dough on medium speed 5 minutes until smooth, elastic and slightly tacky (alternatively, you can turn the dough out onto a lightly floured surface and knead by hand 10 minutes until smooth, elastic and slightly tacky).
- Shape dough into a ball and place in a large, lightly greased bowl. Cover with lightly greased plastic wrap and let rise in a warm place 1 hour until doubled.
- When dough is nearly doubled, combine water and baking soda in a large stockpot. Bring to a boil. Heat oven to 400 degrees F.
- Make the filling: Stir all filling ingredients in a large bowl until well combined.
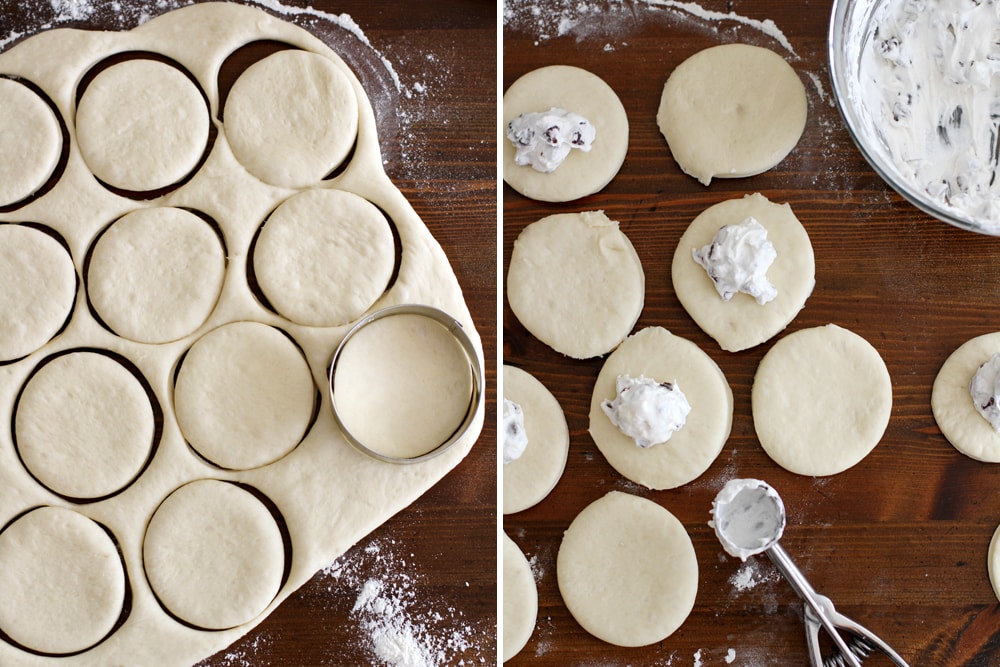
- Punch down fully risen dough. Roll out on a lightly floured surface to 1/4-inch thickness. Use a round biscuit or cookie cutter to cut out circles of dough. Re-roll out scraps as needed.
- Spoon a tablespoon or so of filling into the center of half the dough circles (you may not use all the filling). Top with another dough circle to form a pie; use fingers or fork tines to seal the edges. Transfer pies to a lightly floured baking sheet or platter.
- Place about 3 hand pies at a time in the boiling water bath; boil 30 seconds. Using a slotted spoon, remove pies and transfer to a parchment paper or silicone mat-lined baking sheet. Repeat with remaining pies, placing pies about 1 inch apart on baking sheets.
- Lightly brush tops of pies with egg wash, then sprinkle with sea salt. Bake 12 to 14 minutes until golden brown and puffed. Cool slightly on a cooling rack before serving.
I think this recipe is simultaneously the best and worst thing I’ve ever seen – the best because, well, it’s pretzels, and chocolate, and yum! And the worst because it is absolutely killing my resolve to eat healthier this summer! Amazing!
I cannot even believe these right now!! These are crazy and I’m dying to taste one. I am absolutely obsessed with s’mores, and now with soft pretzel pies! I’m going to have to make that pretzel dough soon. Need it in my life! 🙂
I love the idea of replacing the graham cracker with pretzel. Sweet and salty s’more goodness for life!
Yeah…if you need me I’ll be in the kitchen making these delicious looking hand pies! They look incredible!
AHHH!!! pretzelize all the things!!!!! can we have a pretzel party where we make all of the baked goods into pretzels?? maybe that is what heaven is…
You’ve done me in for good now! These have to be amazing!
I SO wish I could reach into my computer screen right now and grab a few!!
Sweet and salty and s’mores?! Love it!
I hate you for this. Seriously, too good.
Don’t even stop doing recipes like this.
oh mah gawsh. pure brilliance! though I am one of those weirdos who’s favorite part of the s’more is the grahams, so I’ll be a’sprinkin’ some on top when I make these, like, yesterday.
You are BRILLIANT.
Amazing! Love this combo! And yes, s’mores are blowing up this summer. And I’m not complaining about that!
Ohhh my gosh, these look incredible! I can’t wait to try this recipe!
A perfectly perfect idea! Mouthwatering and just what I wish I had, right. now.
Molly — Um, YES. I hope this party can happen someday. 🙂