sourdough baking tips and resources
We’ve come to the end of our two-week series, How to Make Sourdough Bread, today with one post dedicated to answering all of your burning questions about sourdough, sourdough baking tips and a few resources that have helped me along my own sourdough baking journey. Read on to learn everything you want to know about sourdough and set aside any hesitations — you can totally do this.
Hello hello! Today’s post concludes the Girl Versus Dough series on how to make sourdough bread. I’m equal parts sad because it’s over, but also excited because this means you are FULLY PREPARED to go forth and bake sourdough bread. I hope you’re excited, too.
Before we dive into the Q&A and resources, let me say that if ever you have questions about your own sourdough starter or the baking process, please ask me! Send me an e-mail, message me on Instagram or Facebook, or leave a comment below. I will do my best to help you out, no matter what. Help me help you — in the name of sourdough.
OK! Below are a few questions from you lovely people and my answers to the best of my knowledge, plus a few more sourdough baking tips I feel are helpful. Please know that I am not an all-knowing expert on sourdough by any means, but I will answer what I do know and for what I don’t, recommend someone who does.
WHAT’S THE DIFFERENCE BETWEEN A STIFF SOURDOUGH STARTER AND A LIQUID STARTER?
I only have personal experience with working with a liquid starter — the kind that you stir like a thick batter, rather than knead on the counter like dough — so I can’t give a personal testament to the benefits of a stiff starter. What I will say is that in my brief research, there is some theory that a liquid starter tends to produce more lactic acid (rendering a more yogurt-like taste in your bread) whereas a stiff starter tends to produce more acetic acid (rendering a more sour, vinegar-like taste). Some also say a stiff starter can strengthen the overall structure of the finished loaf. But ultimately, all of these variables can change greatly, so it comes down to personal preference. You can read The Perfect Loaf’s take on using a stiff starter for even more information.
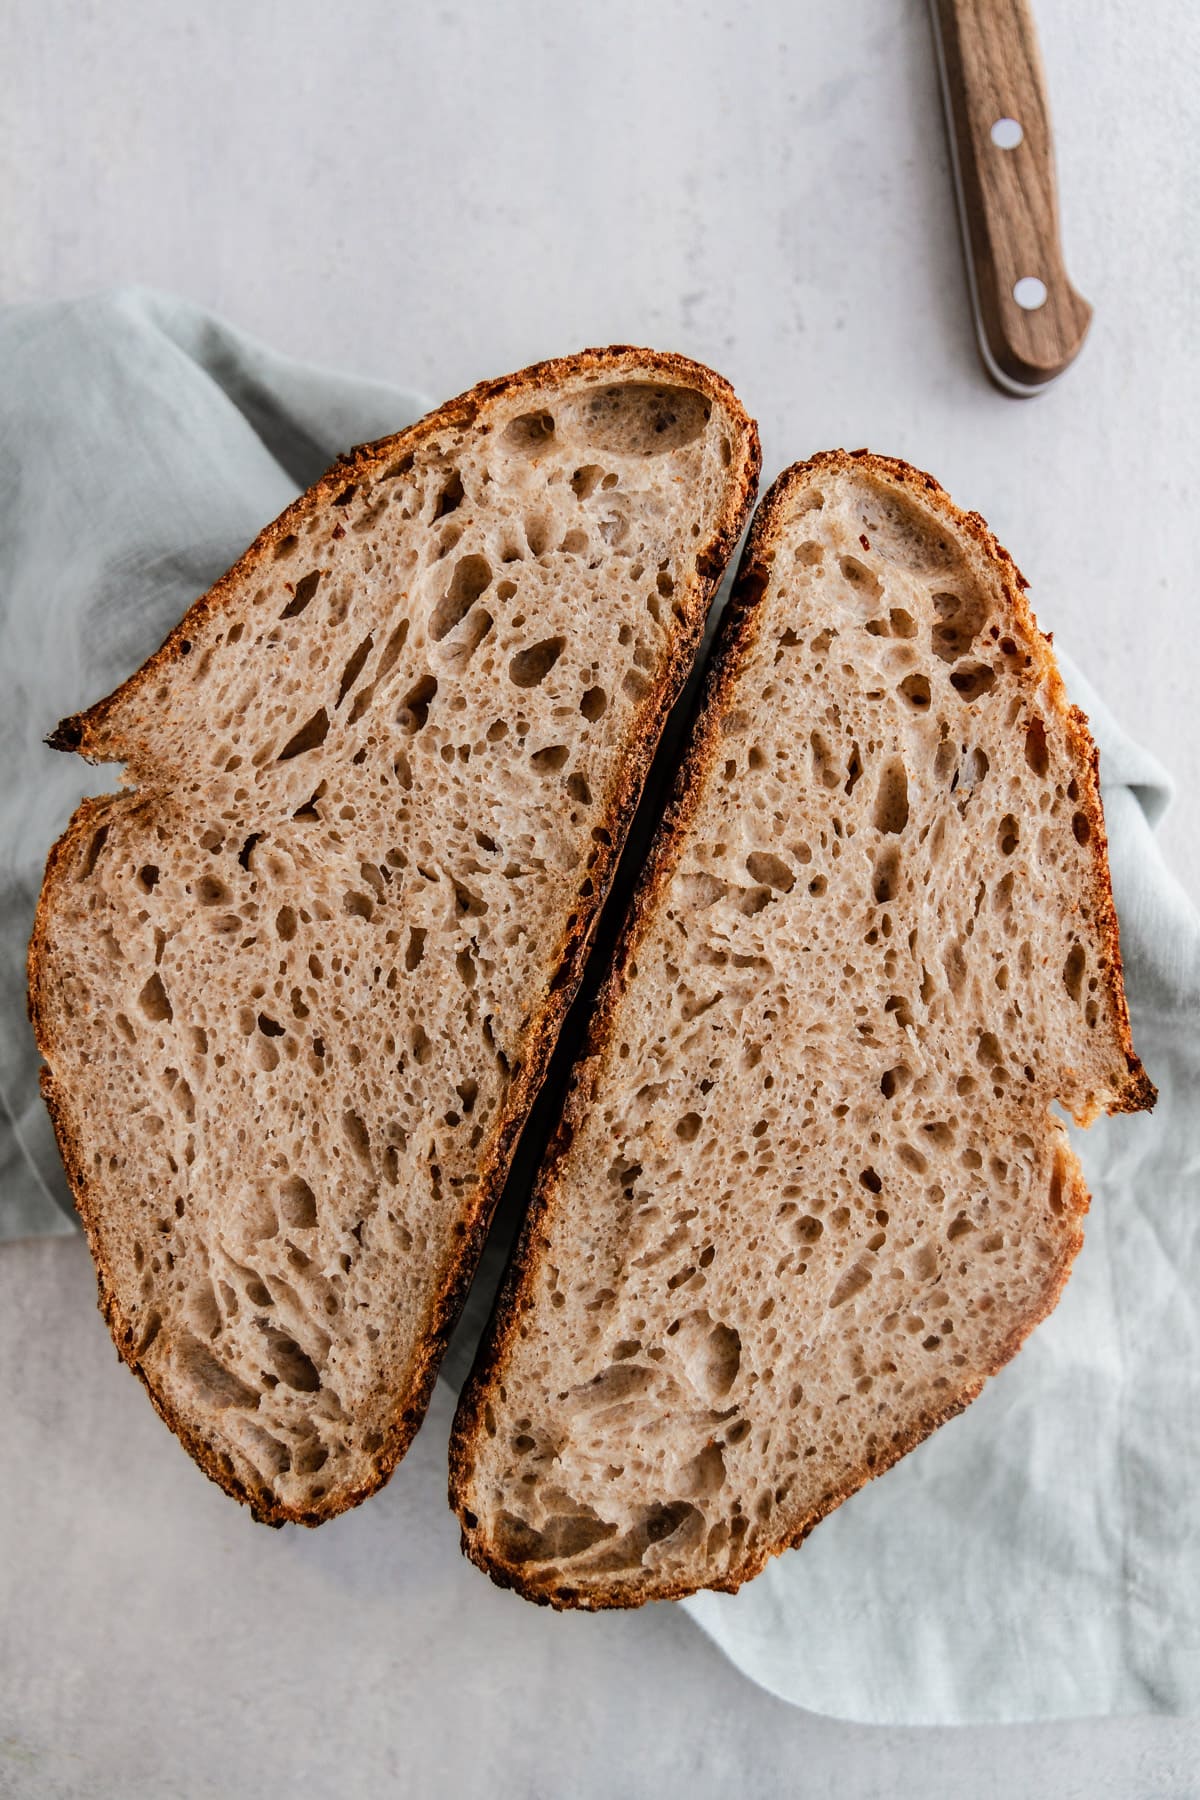
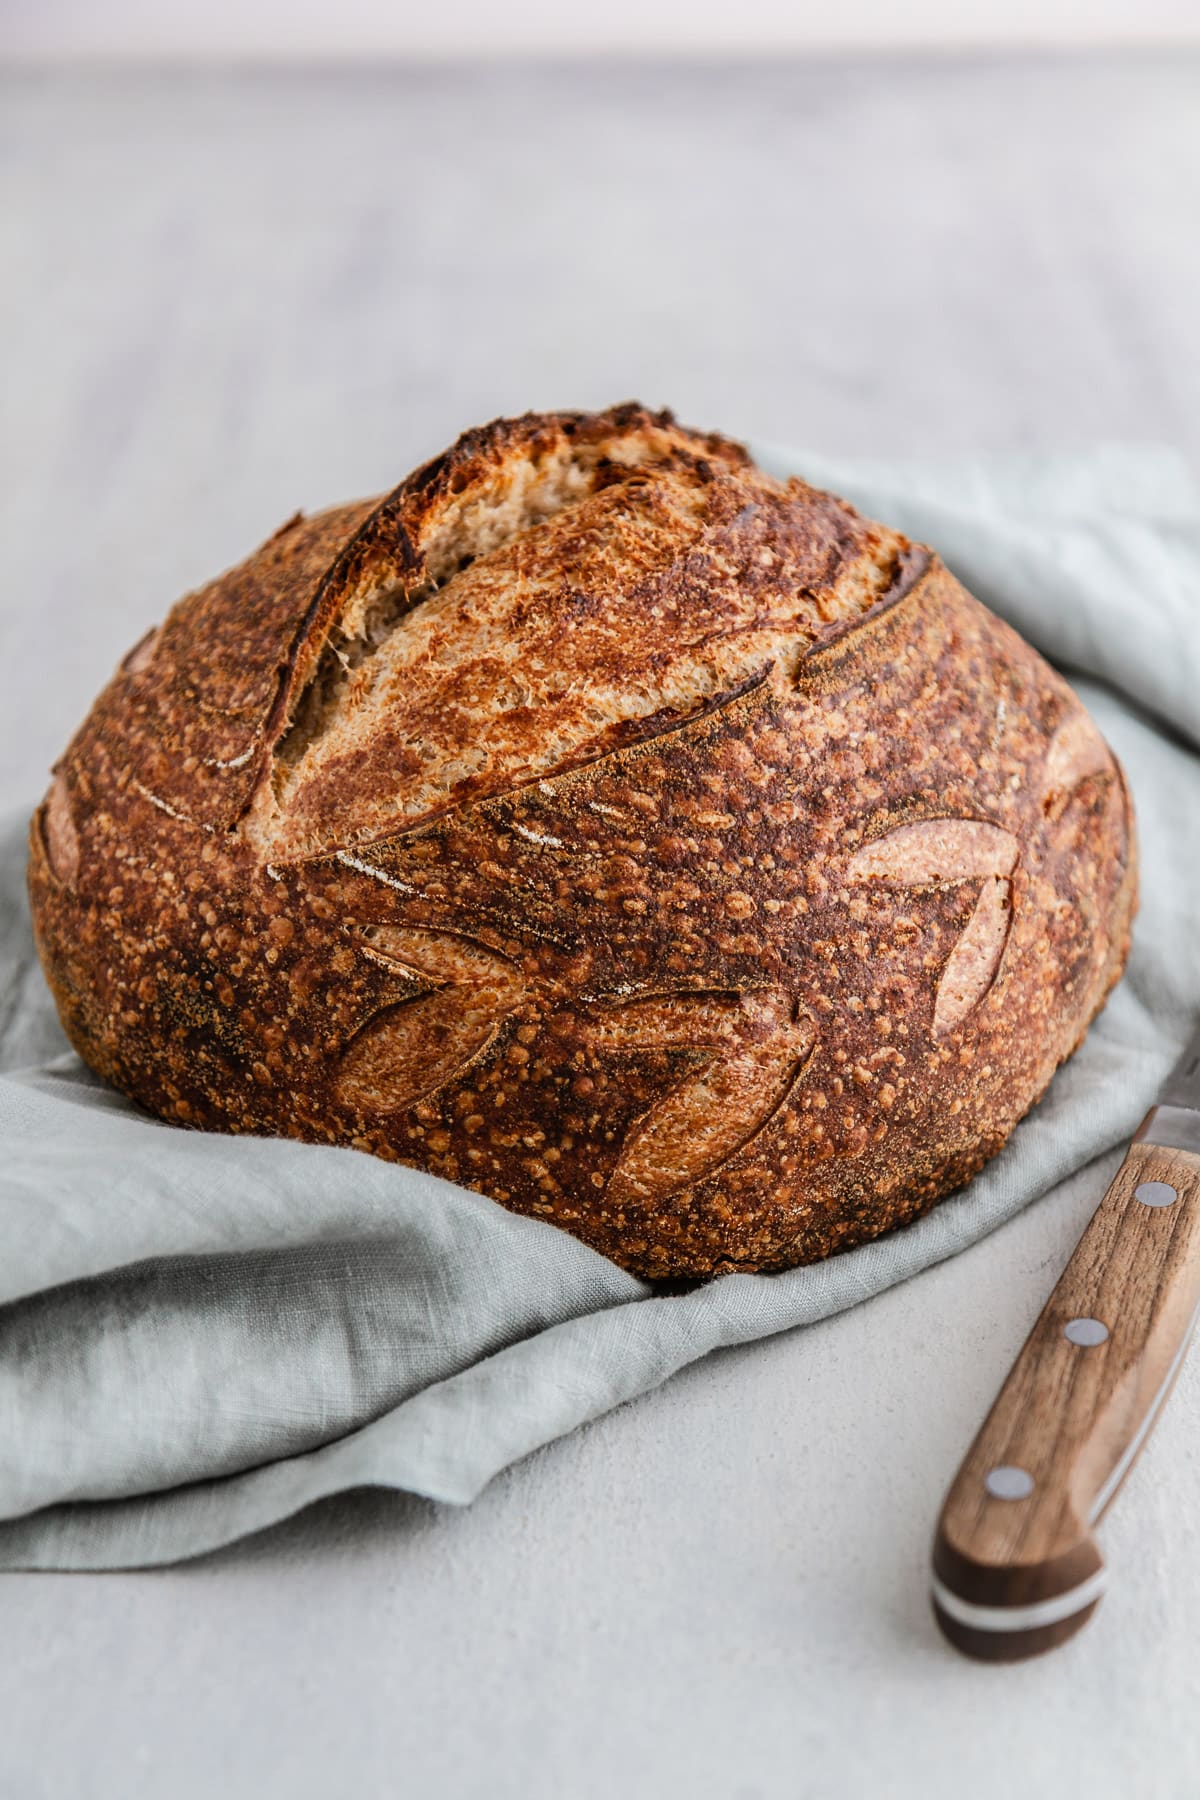
HOW DO I ACHIEVE A MORE OPEN CRUMB IN MY SOURDOUGH?
This is a question I am forever trying to answer myself in my sourdough baking journey, and it’s something that vexes even the most experienced of bread bakers. In my experience and research, the higher the hydration of the dough mix, the more likely you are to achieve a very open crumb in the end result (but the higher the hydration, the more difficult the dough can be to work with, thus the vexing!).
The other factor is the process of making the sourdough bread itself — everything has to be accurate and go well in order for the best result to occur. What I mean is, the bulk fermentation has to go long enough, but not too long; the final dough temperature needs to be 78 degrees F; you can’t accidentally squeeze out the gas bubbles when shaping the dough; etc. It’s all part of the finesse (slash frustration?) of sourdough baking, and for me it’s what makes it mysteriously fun. However, if you are really into this, you can check out Trevor Jay Wilson’s ebook that is literally dedicated to answering this very question — in 300+ words. Clearly he knows a thing or two about it.
WHAT IS HOOCH, AND WHAT DO I DO WITH IT?
Hooch is the thin layer of liquid that can form on top of your starter if it has gone through all of its food and is desperately hungry. It’s actually naturally-occurring alcohol, and if it’s clear or slightly dark, you can just stir it into your starter and proceed with your feeding. However, if there is any streak of orange or pink, or any sign of mold, you need to throw out your starter and start over.
MY STARTER ISN’T RISING AFTER 7 DAYS; DID I KILL IT?
A young starter does require a lot more TLC than a mature starter, but if your starter hasn’t started showing signs of growth yet, don’t fret! Some starters just take their sweet time. If your starter is slacking and it’s been at least a week, make sure you store it somewhere warm (73 to 77 degrees F), like in the oven with the light turned on.
Believe it or not, once your starter has matured, it is pretty tough to kill. You can feed it the incorrect amounts, accidentally freeze it in your fridge, forget a feeding, leave it somewhere too cold overnight, and with a few sessions of correct feedings and an ideal temperature and it’ll likely spring back up to a happy, healthy starter.
OK, BUT WHAT WILL KILL MY STARTER?
Extreme heat is a yeast killer. Anything over 140 degrees F, and yeast will die. So if you have your starter in the oven with the light on, and then preheat the oven and forget your starter was in there (the horror!), unfortunately, that starter is a goner. Write on your hand, put a piece of duct tape on your oven door, tape a post-it note on your forehead — do whatever it takes to remember your starter is in the oven.
The other factor that will kill a starter is severe neglect — that is, if you leave it out at room temperature for weeks without feeding it. At that point, it is likely to develop bad mold and bacteria and that is no bueno for anyone.
WHAT FLOURS CAN I USE FOR MY STARTER?
You can use practically any flour for your sourdough starter — provided it’s grain-based. You can use whole wheat, all-purpose, bread flour, rye flour, einkorn flour, even spelt flour. What’s most important is that at the beginning stages of feeding your starter (when it’s still young), keep on a consistent feeding routine for flour. That is to say — if you’ve been feeding it a mix of whole wheat and all-purpose flour, continue to do so until you have a healthy, mature starter that rises and falls predictably. Once you’re there, you can slowly adjust the ratios at each feeding to suit your preferences (e.g., move to 100% whole wheat).
HOW DO I STORE MY STARTER IN THE FRIDGE, OR MORE LONG-TERM?
Great question! It can get old to feed a starter twice a day every day until the end of time — I get it. You can refer to my favorite sourdough bread recipe post for a complete rundown on how to store your starter in the fridge for up to 1-2 weeks, as well as tips for longer-term storage.
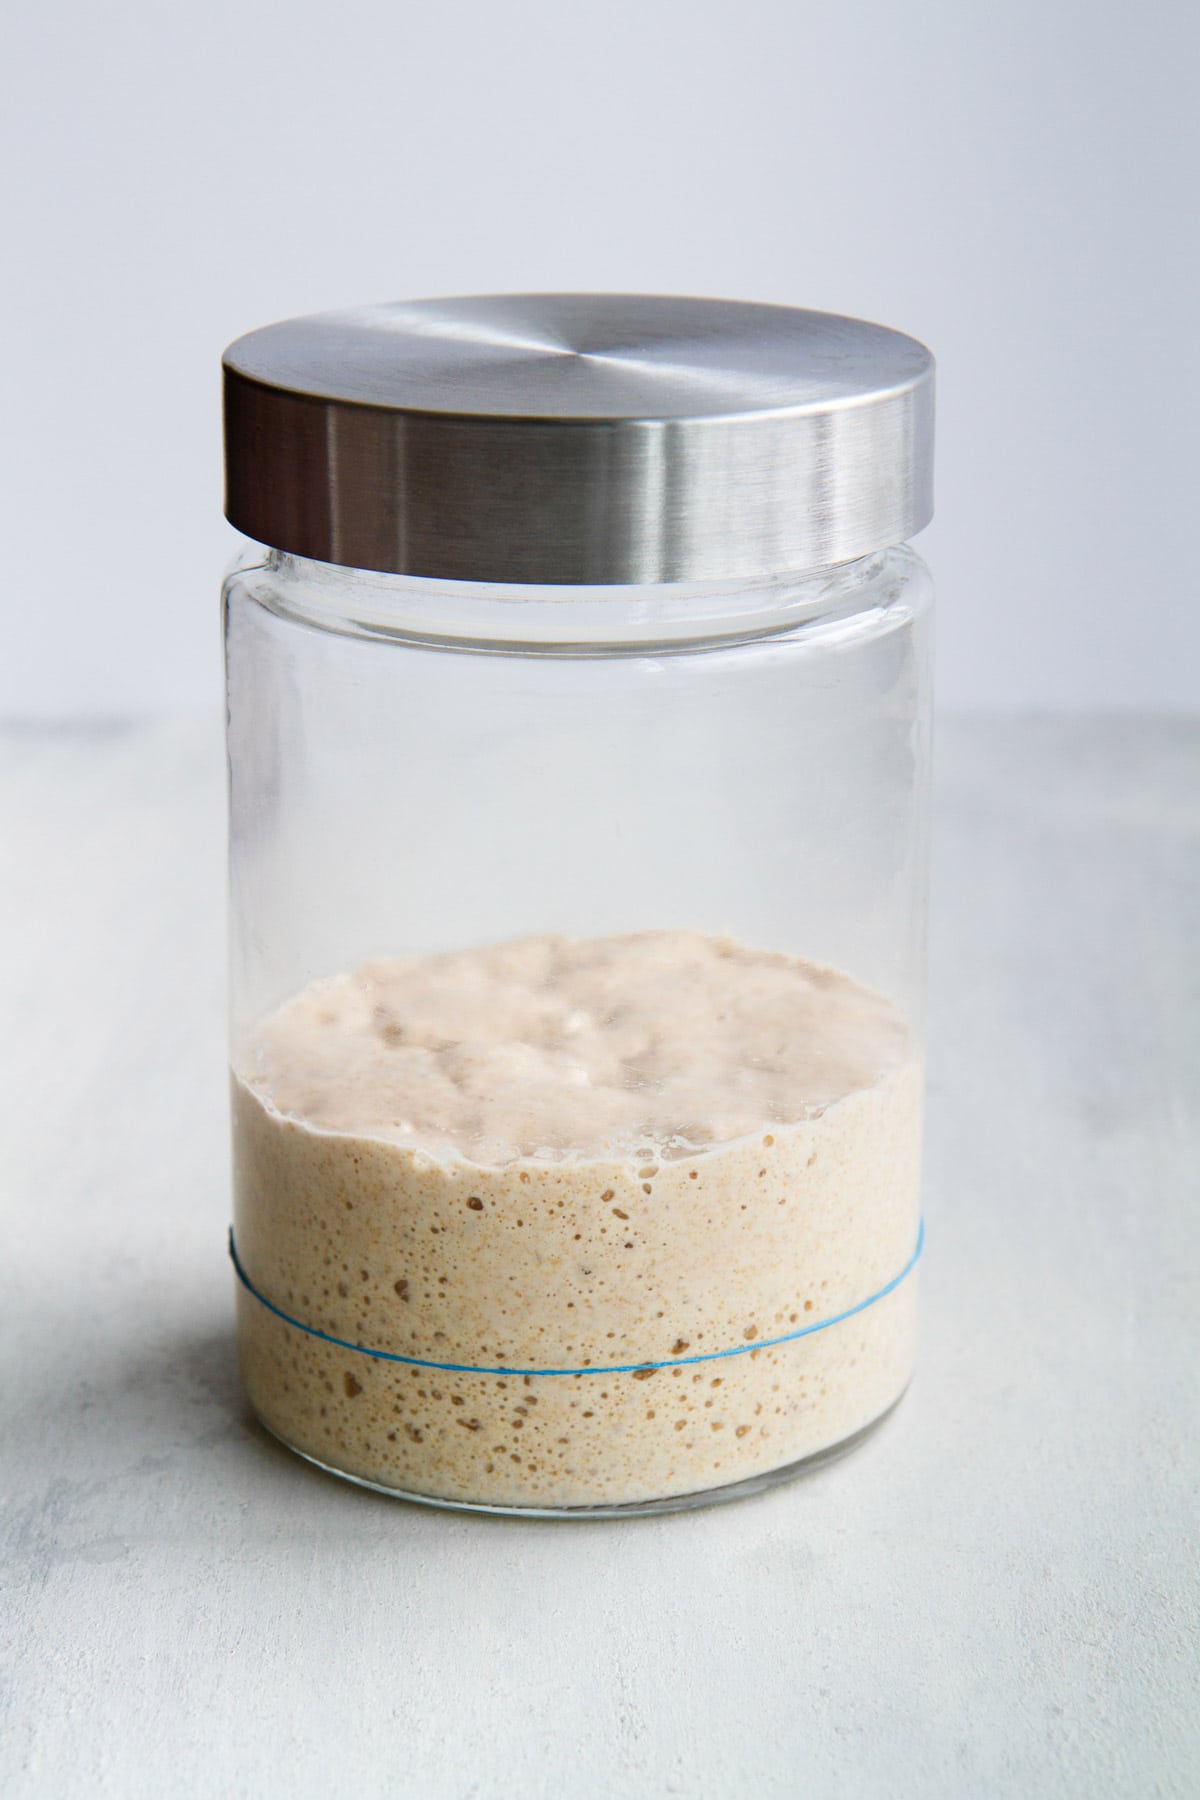
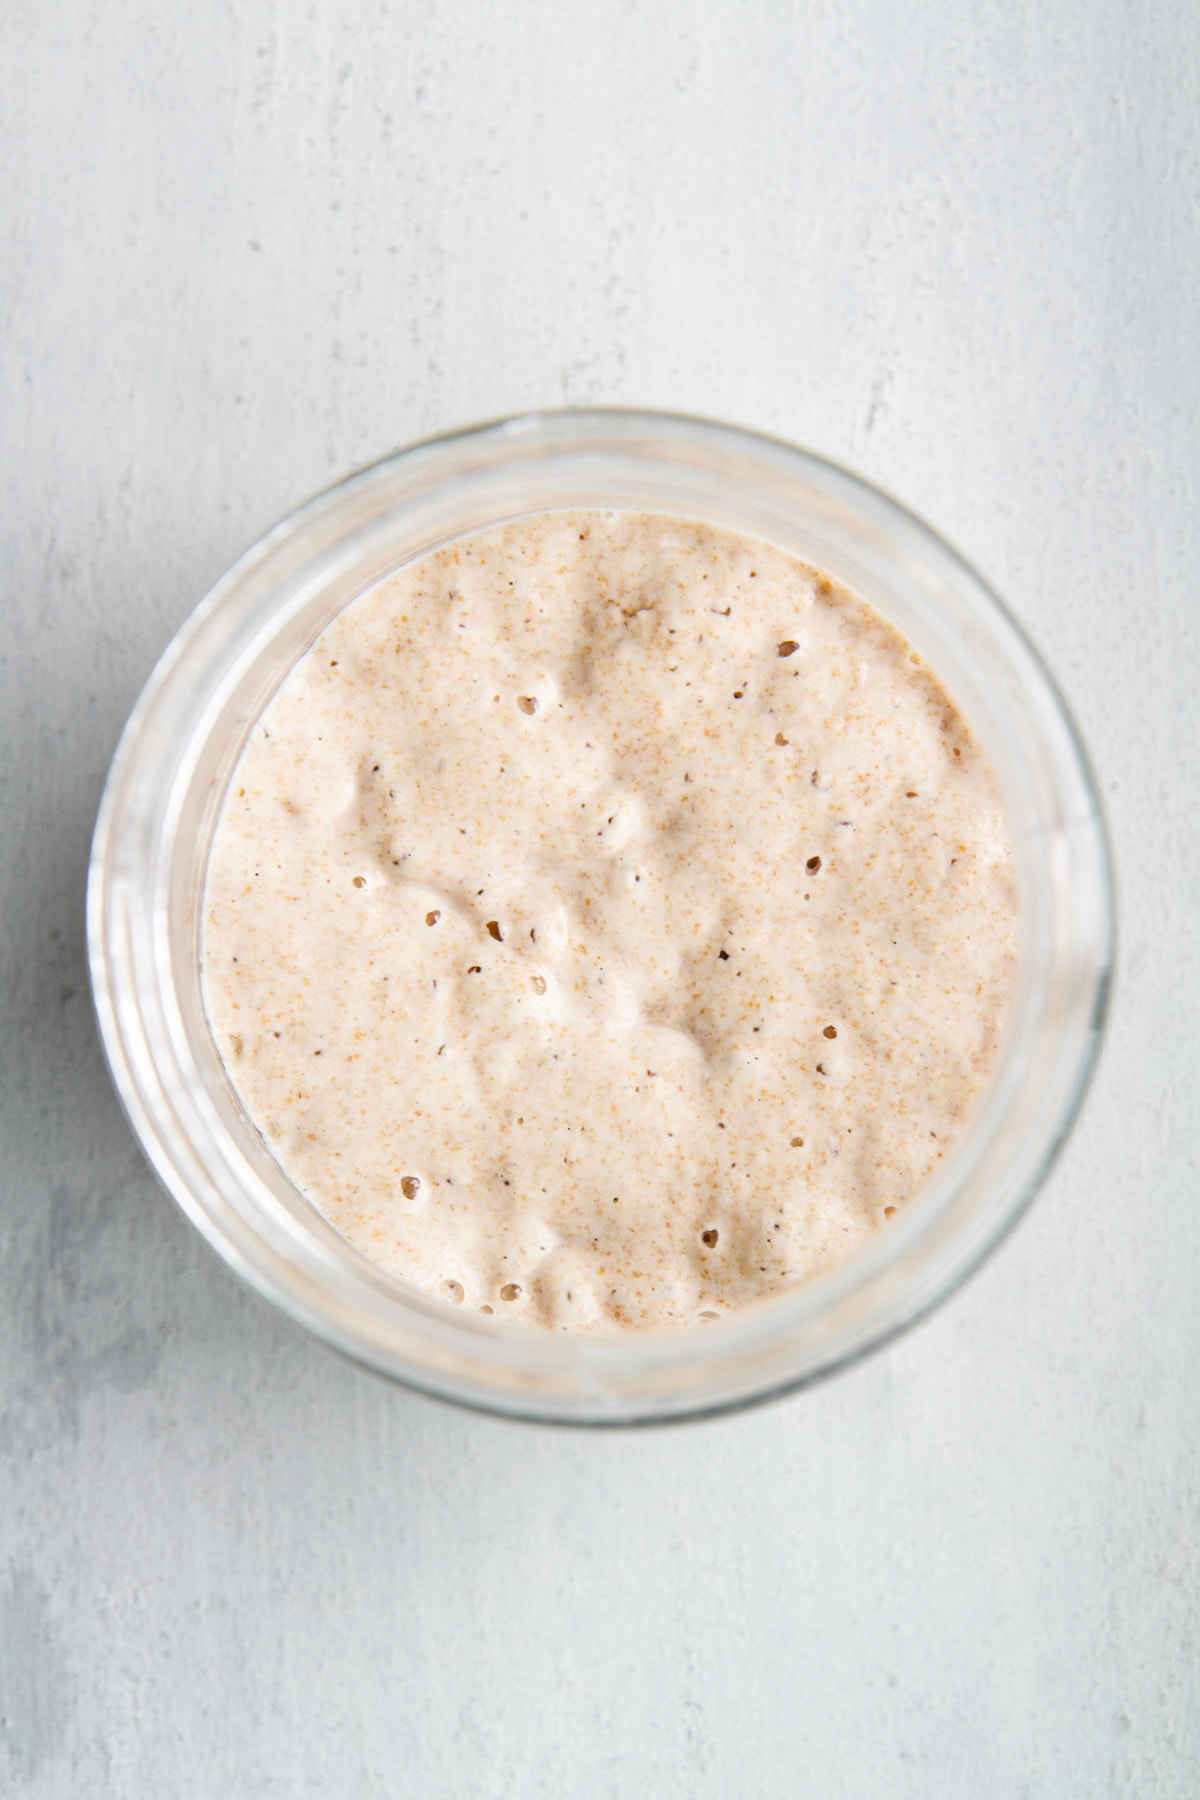
HOW DO I KNOW WHEN MY STARTER IS READY FOR BAKING?
When your starter has a pleasant sour smell, lots of bubbles throughout and is rising and falling predictably each day, you’re likely looking at a starter that is ready for baking sourdough bread. But to be even more sure, you can try the float test: Place a small piece of your starter in a glass of room temperature water. If it floats, the starter is ready! If it doesn’t, it might not be quite ready for baking. Feed it a few more times.
WHAT DO I DO WITH MY SOURDOUGH DISCARD?
It’s true — when you feed your starter, you often throw away a lot of excess starter that seems wasteful. The good news is there are plenty of recipes that use sourdough discard — such as pancakes, waffles, focaccia, muffins, etc.
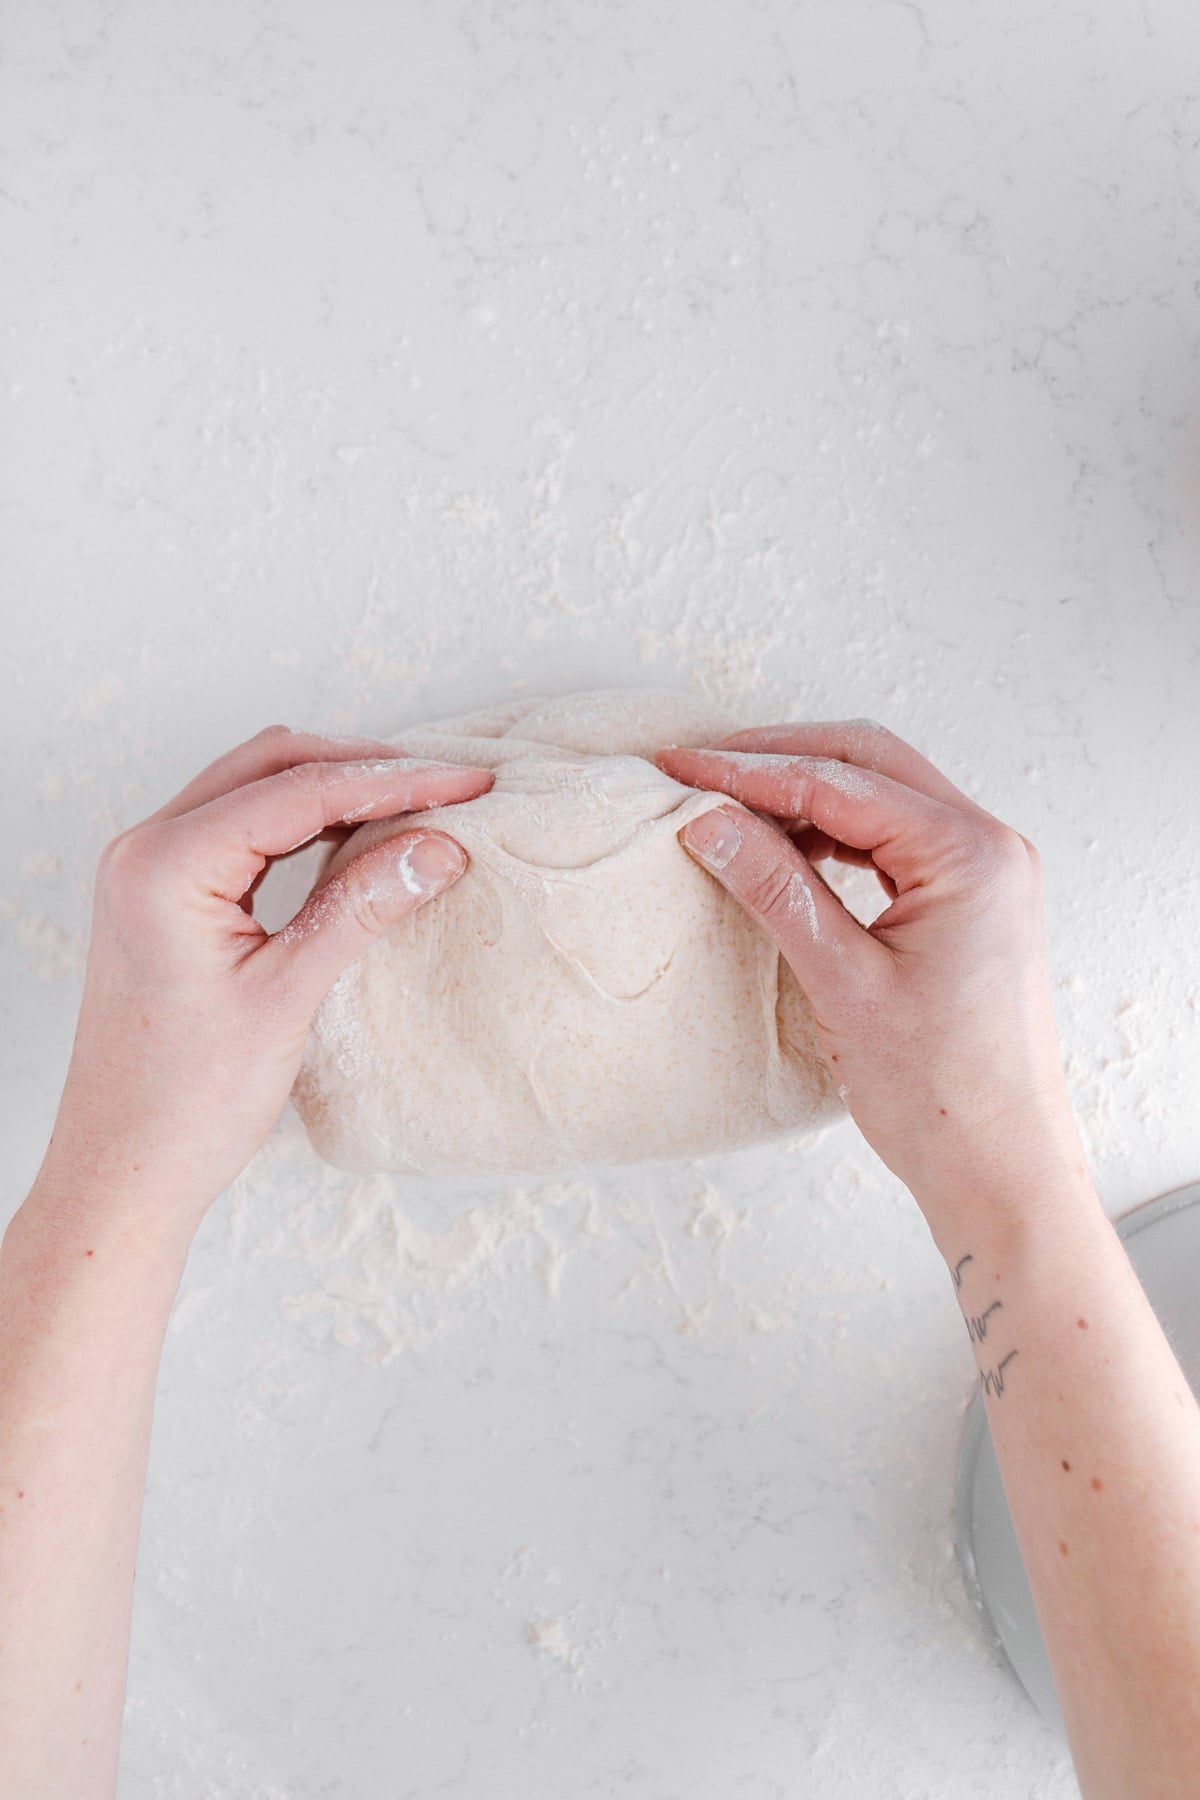
HOW DO I KNOW IF MY SOURDOUGH DOUGH IS READY TO BAKE?
When it comes to yeast breads, you can generally tell a dough is ready to bake when it has doubled in size, or when you poke it in the center, the indent from your finger stays in the dough instead of puffing back up again. When it comes to sourdough, things are a little different. The majority of the “doubling” in size occurs during bulk fermentation, and you can’t really poke it to tell if it’s done because it’s looser than typical bread dough and you want to touch it as little as possible. So the answer in short is: trust the process. If you are following the recipe as closely as possible, and your dough is doing everything it should be each step of the way, then when it’s time to bake the bread, the dough will be ready.
WHAT IF I WANT TO ADD XYZ TO MY SOURDOUGH BREAD, OR CHANGE THE RATIOS OF FLOURS, OR THE HYDRATION, ETC.?
The fun part about sourdough baking is that once you get the hang of it, you can experiment! Add in some nuts or chocolate chips or cinnamon and raisins. Make a whole wheat version. Increase the hydration to get some beautiful air pockets. But I can’t tell you how to do all of those things because I don’t have the answers to all of those things. My best advice? Just try it. Or search the Internet for a recipe to go from. Google is your BFF.
SOURDOUGH BAKING RESOURCES
Here’s a short and sweet list of a few resources that have helped me immensely in my own sourdough journey, whether with technical details to inspiration to little sourdough baking tips I never would have thought of. I want to share about these people with you because they have taught me so much, and that is one thing I love about baking sourdough — there’s a community behind it, and the community is so kind and gracious and encouraging and so smart. So, here we go:
Maurizio of The Perfect Loaf — his website is basically my sourdough bible. I have probably visited his site no less than 1,538 times in the last three months figuring out all the things about sourdough, and he’s never let me down. He is a master at the technicalities of sourdough baking.
Laura of A Beautiful Plate — her Instagram journeys with her starter, aptly named Breadley Cooper, gave me the inspirational push I needed to start baking sourdough. Her Stories are fun and insightful, and she bakes beautiful bread.
Amanda of Heartbeet Kitchen — Amanda is also a huge inspiration to me for starting my own sourdough journey. She makes beautiful loaves, as well, and also has a post with helpful hints for beginner sourdough bakers.
Kristen of Full Proof Baking and Natasha of Natasha’s Baking — both of these women’s Instagram accounts are a sourdough baker’s dream. Beautiful loaves, so many shots of open crumbs, and lots of experimenting! I want to be these ladies when I grow up.
CONCLUSION
Friends, this has been a JOURNEY. But it’s only the beginning! I hope that we continue to have many sourdough bread baking adventures together. Don’t forget to tag #GVDsourdough in your creations so I can see what you’re up to! And as always, follow me on Instagram, Facebook, or sign up for e-mail updates for the latest on what I’ve been baking. I know for me, this is just the start of a long (delicious) adventure with sourdough bread.
As a refresher, below are all of the posts that are part of this series:
Introducing: How to Make Sourdough Bread
Essential Sourdough Tools
How to Make a Sourdough Starter
My Favorite Sourdough Bread Recipe
Did I miss the part where you talk about how to store your starter in the fridge?? I’m interested in trying to make my own sourdough but I’m really not looking forward to babysitting a starter every day for the rest of my life!
Lydia, totally agree! I actually mention that in my sourdough recipe post (the post in the series just before this one). But as a refresher — once you’ve made the levain for your sourdough bread, take another 20g of your mature starter and add it to a clean starter jar. Add 50g whole wheat flour, 50g all-purpose flour and 80g of distilled water. Mix it all together (it’ll be a lot stiffer than what you’re used to), cover it with a lid and refrigerate it for a week, no more than 2 weeks. A couple of days before you plan to bake bread, take the starter out of the fridge, let it come to room temperature (about 2 hours), then proceed with its feeding schedule (2x/day, every 12 hours). Once it starts rising and falling again, you’re ready to make a levain and bake again! Hope that helps — again, see my sourdough recipe post for the full details!
I love this because we were wondering the same. We have been doing sourdough before you started this using another starter that I won’t mention here but we are honestly tired of babysitting it and I keep forgetting to call and ask (if that give a hint to whose starter we have been using –not that we dont love your recipes) about putting it in the fridge.
Sarah — I hope that the fridge tip saves you so much time! 🙂